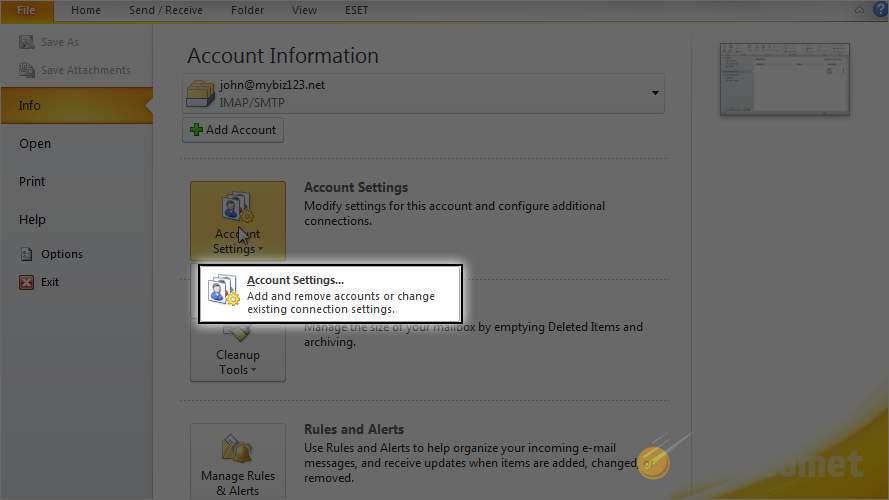
Let's access the Account Settings window as there we will begin with the configuration of the settings. The location of that window is File → Account Settings.
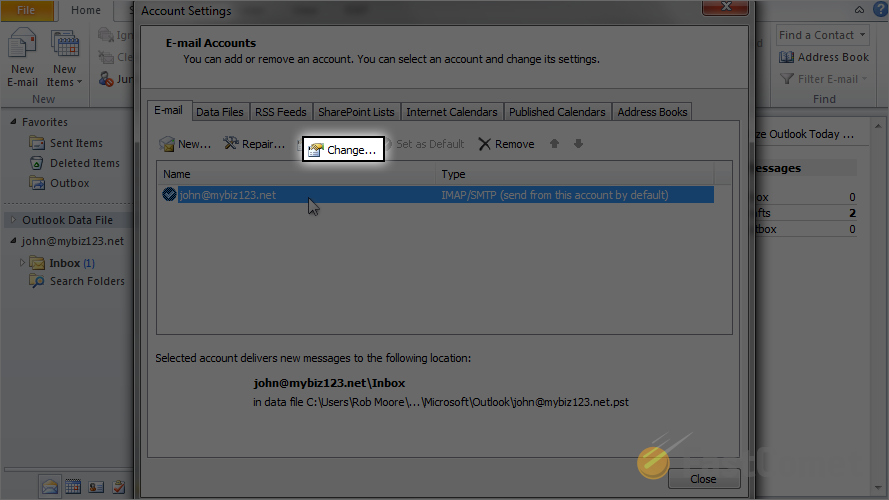
The window contains few tabs but the default selected and also the one you will be using is the E-mail tab. Under that tab you will see a list of email accounts which you have already configured with your email client. Please select the account you would like to change the ports for and click on the Change option.
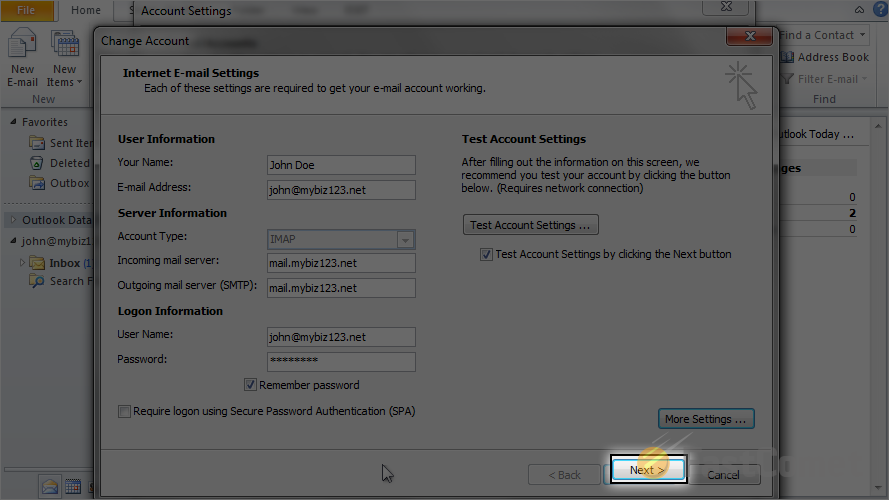
Next you will be presented with the Change Account window where you will notice the basic settings for the email account.
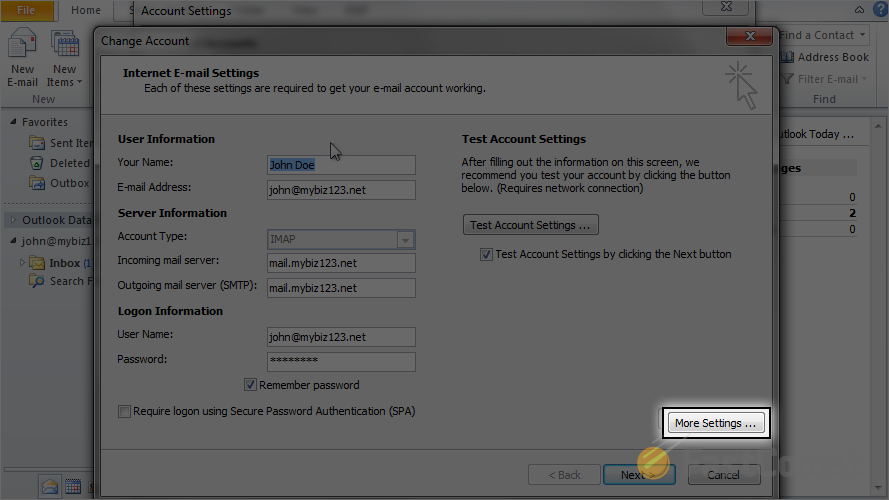
There you will need to click on the More Settings button in order to access the Internet E-mail Settings window where you will need to click on the Advanced tab.
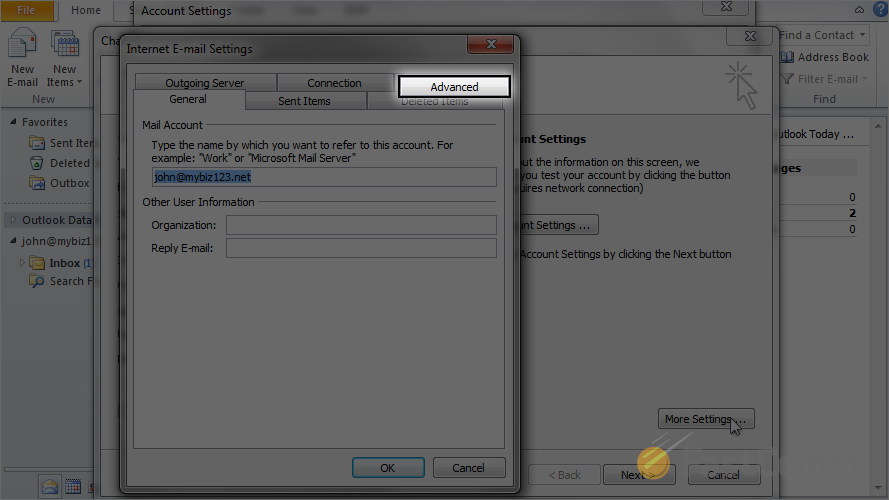
The tab will present you with few sections for configuration, however the one you need is the first one called Server Port Numbers.
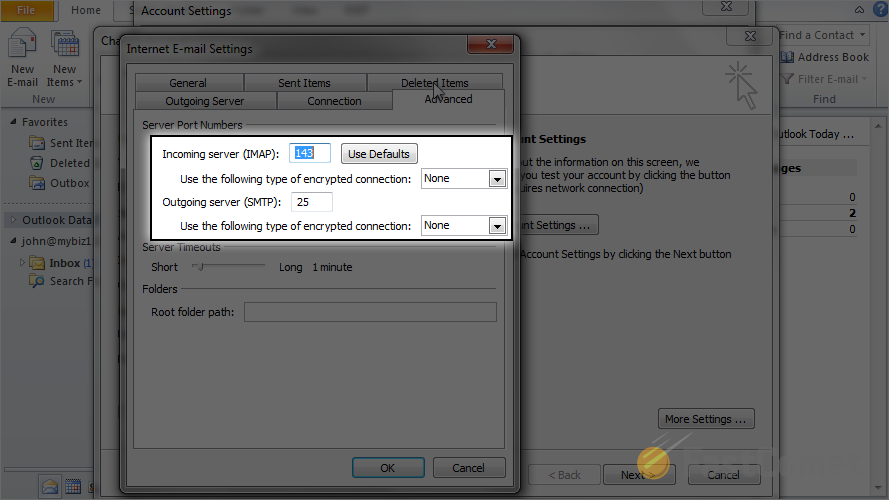
In order to edit the Incoming Server port you can either directly change the port in the corresponding textbox or you can directly select SSL for example so the port can be changed automatically if you need to use SSL.
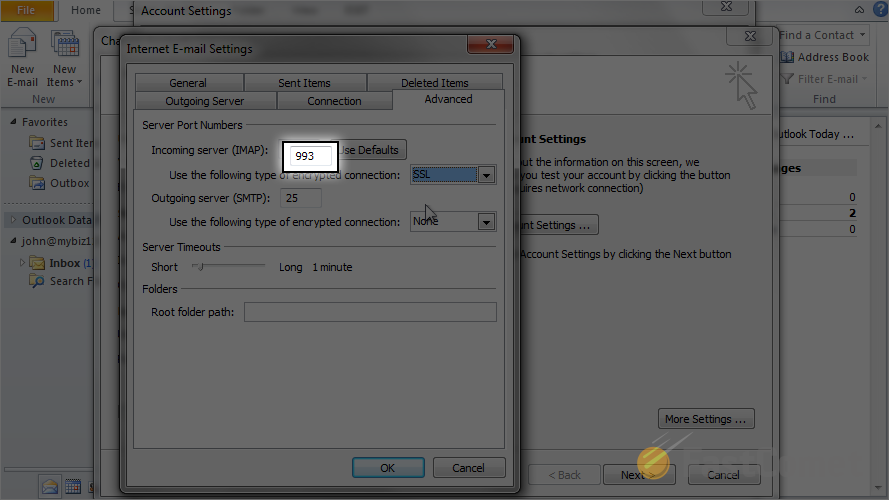
In order to change the Outgoing Server port you will need to also edit the port in the corresponding textbox or you can also select SSL for example in order for the port to change automatically.
Note
Not always the port will be automatically changed when you select SSL and you might need to change it manually. Just for your information the standard SSL port for SMTP is 465.
Once you are ready with the editing of the configured ports please click on the OK button and then on the Next button from the Change Account window.
Congratulations! You have successfully edited the ports of your email accounts!
